Electronic Voting Machine Project Using Raspberry Pi and Fingerprint Sensor
Project Components:
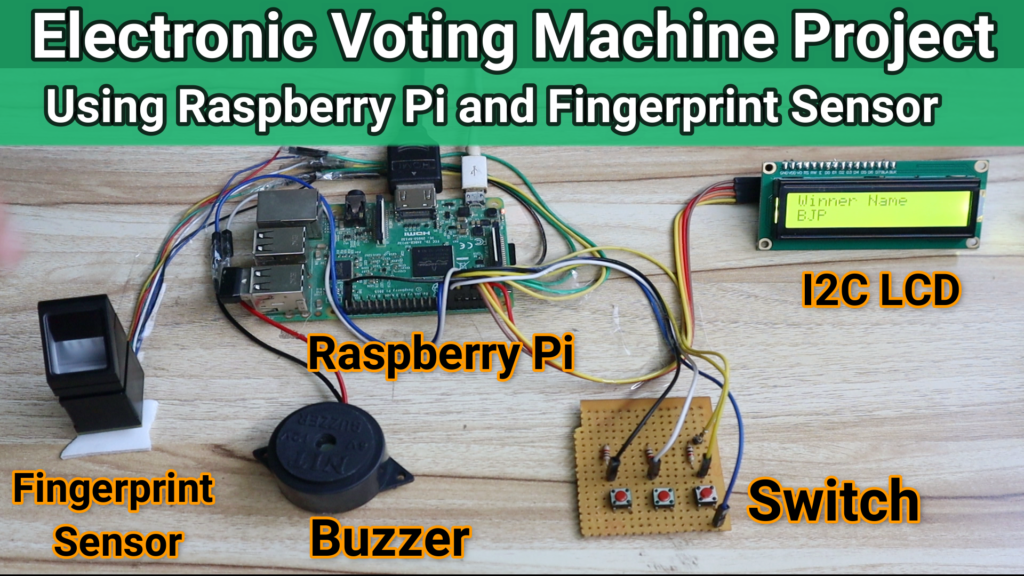
Raspberry Pi: The core of the project, Raspberry Pi will be used to control and manage the entire electronic voting system. Make sure you have a compatible model with GPIO pins.
Fingerprint Sensor: This is a crucial component for voter authentication. Fingerprint data will be used to ensure that each vote is cast by a unique and authorized individual.
LCD Display: A display will be connected to the Raspberry Pi to show relevant information to the voters. This can include candidate names, voting instructions, and confirmation messages.
Buzzer: The buzzer will provide audible feedback to voters, indicating successful votes, duplicate votes, or invalid votes.
Functionality:
Voter Authentication:
The Fingerprint Sensor will be used to authenticate voters before allowing them to cast their votes. Only authorized voters with pre-registered fingerprints will be allowed to vote.
Display Messages on LCD:
The LCD display will show the list of candidates and any relevant instructions for the voters.
Vote Casting:
After successful authentication, the voter can cast their vote by selecting the candidate of their choice. The system will record the vote in the backend.
Confirmation Message and Buzzer for Successful Vote:
Upon successful casting of the vote, a confirmation message will be displayed on the LCD, and the buzzer will sound to indicate that the vote has been successfully recorded.
Duplicate Vote Check and Buzzer:
The system will check for duplicate votes to prevent multiple votes from the same individual. If a duplicate vote is detected, a buzzer will sound, and a message will be displayed on the LCD.
Invalid Vote Check and Buzzer:
The system will validate each vote to ensure it is legitimate. If an invalid vote is detected (e.g., voting for more than one candidate), a buzzer will sound, and a message will be displayed on the LCD.
Project Code:
Download project code from below button.
If you want to understand code explanations then please watch YouTube video.


Leave a Reply