
Description:
- The Electronic Voting Machine (EVM) Project proposed in this research aims to revolutionize the traditional voting process by incorporating advanced technology and enhanced security measures. The project is based on the Raspberry Pi platform, integrating a face recognition algorithm to validate voters and a user-friendly switch button interface for casting votes securely and efficiently.
- The primary objective of this project is to streamline the voting process, ensuring accuracy, transparency, and ease of use while eliminating potential vulnerabilities associated with manual voting systems. By leveraging the power of Raspberry Pi, facial recognition technology, and switch button interaction, the EVM offers a robust, tamper-resistant, and convenient voting solution.
- The key components of the EVM system are as follows:
- Raspberry Pi: The heart of the EVM, Raspberry Pi serves as the central processing unit. It manages the entire voting process, facilitates communication with peripherals, and stores voter information and voting data securely.
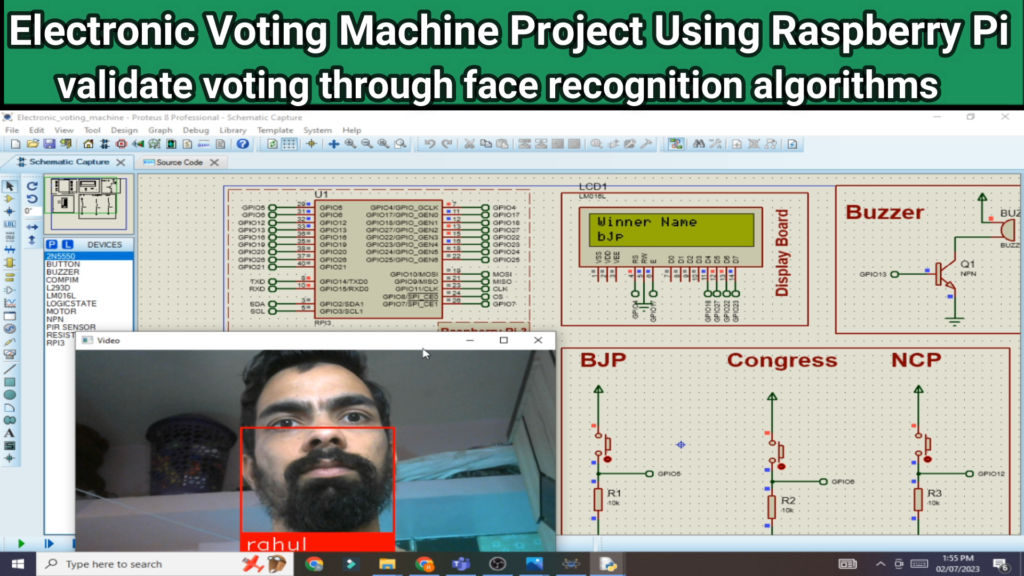
- Face Recognition Algorithm: A state-of-the-art face recognition algorithm is integrated into the system to verify the identity of voters. Before casting their vote, voters must present themselves to the EVM’s camera, which captures and processes their facial features, ensuring they are eligible and unique voters.
- Switch Button Interface: To ensure voter privacy and simplicity, the EVM incorporates a switch button interface. Once the voter’s identity is confirmed through facial recognition, the voter can press the corresponding button associated with their preferred candidate. This design minimizes complexity and prevents unauthorized access to voting data.
- The voting process involves the following steps:
- a. Voter Authentication: Voters approach the EVM and stand in front of the camera. The face recognition algorithm matches the captured image with the pre-registered voters’ database to authenticate their eligibility.
- b. Voter Authorization: Upon successful authentication, the EVM displays the names of the candidates for the respective election. The voter can then press the corresponding switch button associated with their desired candidate to cast their vote.
- c. Voting Validation: The EVM logs the vote in its internal memory and cross-verifies the voter’s identity to prevent any potential duplicate voting attempts.
- d. Result Generation: After the voting period ends, the EVM calculates the total votes received by each candidate and generates an accurate and transparent result.
- The EVM’s implementation will be accompanied by rigorous testing to ensure accuracy, security, and robustness. The project aims to address concerns related to voting fraud, impersonation, and manual counting errors commonly associated with conventional voting systems.
- In conclusion, this Electronic Voting Machine Project using Raspberry Pi, with a face recognition algorithm for voter authentication and a switch button interface for casting votes, promises to be a significant step towards modernizing and securing the democratic process. The system’s adaptability, efficiency, and voter-friendliness make it a potential candidate for future electoral use.
Software Require:
- You need to install the Proteus 8.9 version in your laptop.
Project Code:
- Download project code from below button. If you want to understand code explanations then please watch YouTube video.
YouTube Video:
- If you want to understand how to connect hardware with Raspberry Pi,
- And Program explanation for this project,
- And how to do this project by yourself then please watch our YouTube video.
Purchase Readymade Project:
- If you want to purchase a readymade project from Mytrained.com then contact us on whatsapp.
- We do not encourage any student to purchase a readymade project from us. Our mission is to give complete knowledge free of cost.
- So from our end we already provide code and detailed steps to create this project by yourself in our YouTube video.
- So if you want to save your money then watch our video and follow the steps that are mentioned in the video.
- Once you purchase a project then it will take at least 1 month to design your project.
- You have to pay the complete project cost while placing the purchase order.
- no refund no exchange policy

Leave a Reply