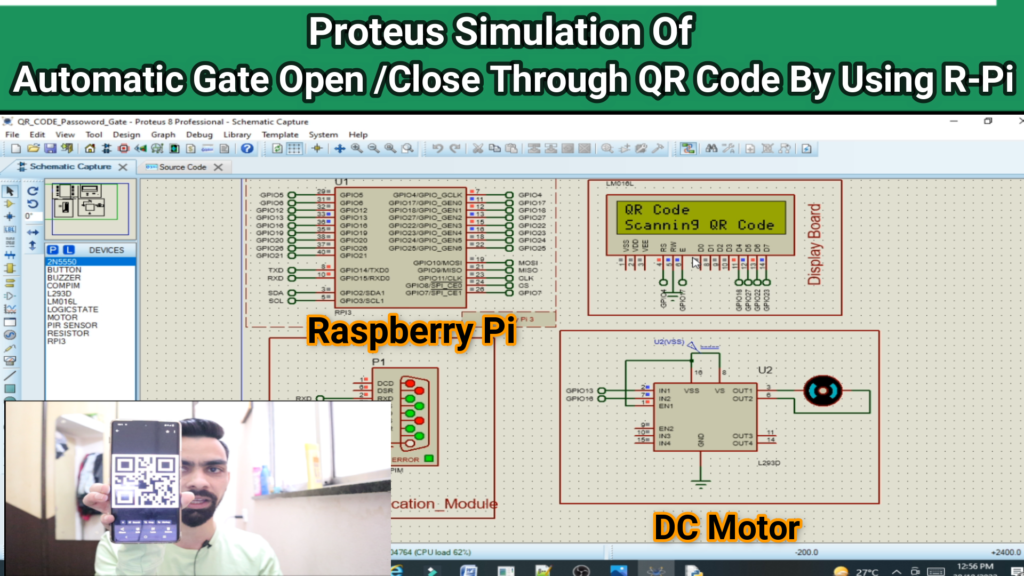
Description:
- The Automatic Gate Open/Close System project aims to create an automated gate control system that allows users to open or close a gate using QR codes. The system will be built around a Raspberry Pi, which will process the QR codes and control the gate’s motor through suitable hardware interfacing. Proteus simulation will be used to test and verify the system’s functionality before actual implementation.
- Components:
- Raspberry Pi: A credit-card-sized computer that will serve as the brain of the system. It will process QR codes, control the gate’s motor, and manage the entire operation.
- Gate Motor: An electric motor responsible for opening and closing the gate. The Raspberry Pi will interface with the motor to control its operation.
- QR Code Scanner: A camera module connected to the Raspberry Pi that can capture QR codes and decode the information contained within them.
- Relay Module: A relay module will be used to control the gate motor. The Raspberry Pi will trigger the relay to open or close the gate based on the QR code information.
- Gate Mechanism: The physical gate itself, which will be automated using the gate motor and controlled through the Raspberry Pi.
- Proteus Simulation Environment: Proteus is a simulation software that allows us to model and simulate the entire system virtually before implementing it in the real world.
- Working Principle:
- User Interaction: When a user arrives at the gate, they will present a QR code to the QR code scanner.
- QR Code Decoding: The camera module will capture the QR code image, and the Raspberry Pi will process the image using appropriate libraries to decode the QR code’s information.
- Data Interpretation: The QR code will contain specific information, such as “open” or “close” command along with authentication data.
- Raspberry Pi Control: The Raspberry Pi will interpret the data from the QR code and validate it against the stored authentication information.
- Gate Motor Control: If the QR code is valid, the Raspberry Pi will trigger the relay module, which in turn will control the gate motor to open or close the gate accordingly.
- Proteus Simulation: Before implementing the system physically, a Proteus simulation will be set up to verify the circuit connections, control logic, and overall functionality of the system.
- Proteus Simulation Steps:
- Creating the Circuit: The components, including Raspberry Pi, QR code scanner, relay module, and gate motor, will be virtually connected in Proteus to form the complete circuit.
- Programming the Raspberry Pi: The Raspberry Pi’s functionality, including QR code decoding, data interpretation, and gate motor control, will be programmed within the Proteus simulation.
- Simulating the System: The simulation will be run with different QR codes representing various scenarios, such as successful gate opening, unsuccessful attempts, and invalid QR codes.
- Troubleshooting and Validation: The simulation results will be analyzed to identify any issues or potential problems. Necessary modifications will be made to ensure the system works as intended.
- Final Verification: After successful simulation and debugging, the automatic gate open/close system will be deemed ready for physical implementation.
- Conclusion: The Automatic Gate Open/Close System using QR code and Raspberry Pi with Proteus simulation offers a secure and convenient way to control access to a gated area. Users can simply present a QR code to open or close the gate, eliminating the need for physical keys or remote controls. The Proteus simulation provides a robust platform to test and validate the system’s functionality before deploying it in the real world, ensuring a reliable and efficient implementation.
Software Require:
- You need to install the Proteus 8.9 version in your laptop.
Project Code:
- Download project code from below button. If you want to understand code explanations then please watch YouTube video.
YouTube Video:
- If you want to understand how to connect hardware with Raspberry Pi,
- And Program explanation for this project,
- And how to do this project by yourself then please watch our YouTube video.
Purchase Readymade Project:
- If you want to purchase a readymade project from Mytrained.com then contact us on whatsapp.
- We do not encourage any student to purchase a readymade project from us. Our mission is to give complete knowledge free of cost.
- So from our end we already provide code and detailed steps to create this project by yourself in our YouTube video.
- So if you want to save your money then watch our video and follow the steps that are mentioned in the video.
- Once you purchase a project then it will take at least 1 month to design your project.
- You have to pay the complete project cost while placing the purchase order.
- no refund no exchange policy


Leave a Reply